Continuing from my last post with Part 2 of putting my StudioBricks booth together. If you haven’t read it yet, I suggest doing so to keep up with what I’m sharing here.
I had put my studio together with the help of my brother, my boyfriend and my Dad. It looked amazing and was quite cozy inside. However, after all the unloading, and putting it together one section at a time (which took maybe 3 hours), there was a problem.
The floor was creaking.
Each time I stepped in or moved my feet around, the wooden boards on the outer floor frame made slight scraping sounds that I knew would interfere with recording and be a pain to edit out. After speaking with the great folks at StudioBricks and my good friend Jerry Pelletier, who was instrumental in helping me understand the fine points of how to assemble it, we realized the floor was uneven. Now, foot holders came with the package and were easy to adjust. Unfortunately, we neglected to measure each area to make sure the sides were even. There was only one solution to treat the problem: Taking it apart piece by piece and starting all over again.
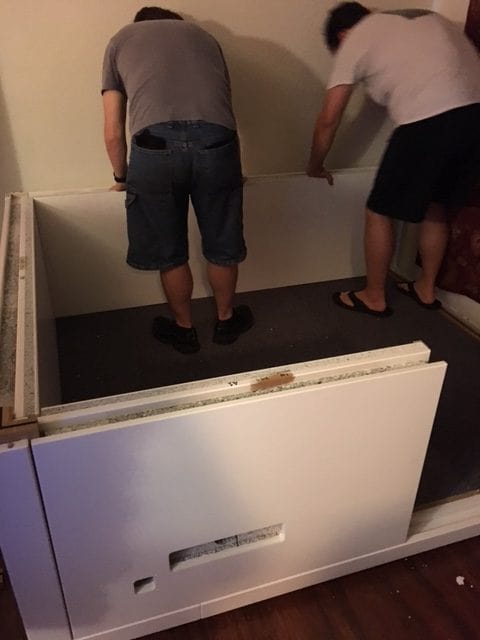
For this round, my boyfriend and two of our friends helped. We started from the ceiling, and took the whole thing apart from top to bottom. Once we got to the floor we spent 30-45 minutes making sure the feet were adjusted accordingly, and that each side was even. Then, we added foam beneath the floor boards. It’s not necessary to use expensive Auralex foam. We used cheap bedding foam from Walmart. We had to apply something heavy for the middle board for a while since it kept trying to pop up. But now it no longer needs pressure to keep it down. We walked on it several times to make sure the creaking was gone. I can occasionally hear a tiny scrape when stepping inside, but it doesn’t stick around. Now I can sit, stand and move without worry that noises will interfere with recordings.

We assembled each section yet again, starting from sections label A1 to A5, then B1 to B5, then C1 and C5 and onward.
Despite how exhausting the process was of putting it together, then taking it apart and building it back up, it was totally worth it!! I love going inside to record now. I don’t hear planes flying overhead, I don’t hear the 60 hz hum in the walls and I don’t hear my PC.


Some tidbits worth sharing about my experience thus far:
-I specifically asked the manufacturers not to include the aeropack fan. They assured me that it’s silent. However, it’s really not. Even still, they sent the fan anyway, free of charge. I don’t use it.
-The subject of airflow in the booth is an important discussion. At the moment, I have nothing filtering air outside in. It’s a process still in the works.
-I didn’t use all the foam that the booth came with, not even the bass traps. In fact, most of that stuff is in my closet. Quite a few people said to use the bass traps on the corners, but because they’re solid foam, I worry that they’ll make me sound boxed in with the foam already built on the walls. So, for the time being I have sound panels positioned around me, which I made with compressed fiberglass boards wrapped in calico cloth from a fabric store. I’d like to have one positioned above my head on the ceiling, as I’m not crazy about the egg shell foam above my head.

-I don’t like the desk that came with booth because when I sit to record and brush against the edge of the table it rattles a bit. It’s left in there for now, until I can find something better. I recommend a wooden table with wobble-proof legs.
-The window is left uncovered for the time being, but if I hear too much reflection when I’m shouting for games or animation, I’ll cover it temporarily with some foam or moving blankets.
-If you get a chair, make sure it too doesn’t rattle when you sit or shift in it.
-If you get a booth of any kind, I recommend going with a rectangular space, not square. If you have doubts, contact home studio professionals like George Whittam, Dan Lenard, or Dan Friedman. If you Google their names, you’ll get great info.


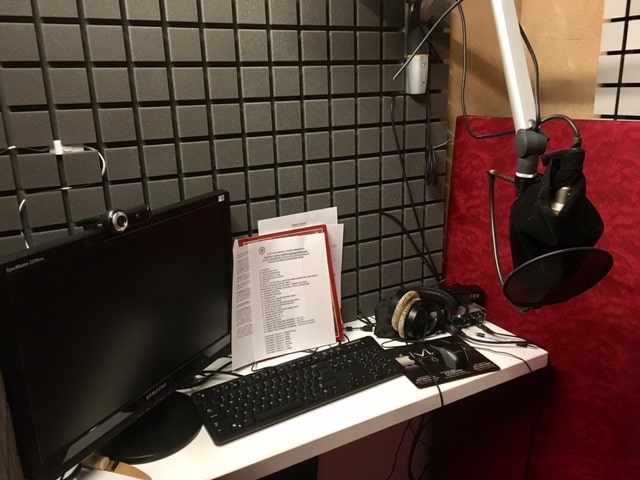
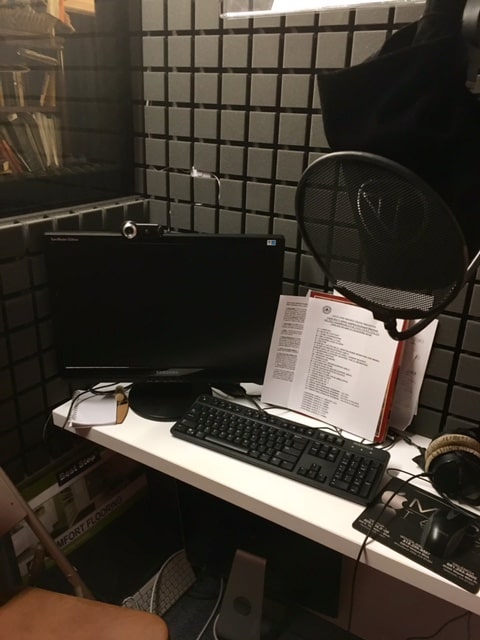
It’s still a process to make it just right, but the booth is finished and I love it!
If you decide to specifically go with a StudioBricks booth consider the following:
-Know the exact size you want, and the space in your apartment or house for it. Measure out how much feet it’ll take and keep in mind the booth will weigh over 2,000 pounds. Be sure your floor can hold that amount of weight!
-Don’t rely on foam alone to fix all your problems acoustically. The booth will need more treatment no matter what. Some complain that the booths are too much of a pain to treat, but others say it’s great. I like mine so far.
-There are single-wall, double-wall and triple-wall booths. Don’t just consider the space you have now, especially if you plan to relocate. It’s more expensive, but I went with a triple wall so as to not worry about potential problems at future locations when I move to. Remember, this is an investment.
-A wooden door or a glass door? I don’t suffer from claustrophobia so I went with a wooden door so that I could mount a panel or foam on it if necessary. A glass door would cause too much reflection and I can’t hang a panel or glue foam on it since the surface would be damaged.
-Do NOT assemble the booth by yourself. Find friends or if need be, hire help.
-MAKE SURE THE FLOOR IS EVEN before assembling the whole thing!!
That’s my journey. So far no one has complained about my recordings. As I said earlier, I’m still going to make tweaks and changes here and there. It’ll never be perfect, but so far it’s helped a lot!
If anyone has questions, please feel free to ask them and I’ll do my best to answer.


